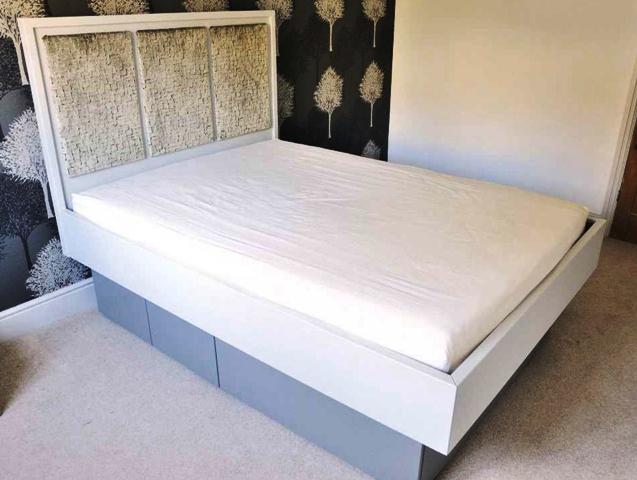
Every home needs somewhere for family and friends to hang their coats. This modern version of an old favourite features eight double hooks, all neatly recessed into an oak back board

In winter the family tends to use more and more coats, and this wall-mounted rack provides space for plenty of them with a useful set of eight double hooks. It’s sized to suit the wall space available; the dimensions and number of hooks are easily adjusted to meet your own requirements.
The rack I’ve designed features stainless steel hooks and an oak back board. Coat hooks are usually mounted directly onto the back board, but to add a bit of finesse here I recessed the hook bases into shallow sockets in the back board to give a flush surface. My hooks were made by Hafele.
Checking the wall
When fully laden with coats the rack will be quite heavy, so I wanted a high-strength fixing to the wall. With this in mind I decided to start by looking at how the wall was constructed and checking for any hidden services within it.
Fortunately, this was a stud partition wall and I was able to locate the centre line of the studs using my hand-held cable and pipe detector, photo 1. The studs provide ready-made fixing points for attaching the rack using screws.

Making the back board
Start by preparing the back board to the required dimensions. I used a plank of oak I already had in stock that needed some more machining. I crosscut the plank slightly over-long and then ripped it oversize along its length using my bandsaw, photo 2. Then I planed the plank flat, squared up an edge, thicknessed the work, photo 3, and crosscut it to the final length. Mine measured 1345 x 140 x 25mm.
Next, I marked the hook positions on the back board, photo 4, using a tape measure and square to set them at 170mm intervals. You can vary this if you wish.
Cutting the hook sockets
The next task was to cut the eight sockets in the back board for the hook bases. Mine needed recesses 48mm in diameter and 4mm deep. I had intended to cut the sockets using a Forstner bit, but the closest size I had available was 54mm in diameter. Instead, I decided to cut them using a home-made router template based on a 54mm diameter hole. After fitting my hand-held router with a 14mm straight cutter and a 20mm guide bush, it would take only a few moments to cut the required 48mm diameter sockets.
Routing the sockets
I made the template from an offcut of 9mm mdf, and began by drilling a 54mm diameter hole in its centre. Then I screwed on a pair of parallel guides, spaced 140mm apart, to locate the template across the back board, photo 5.
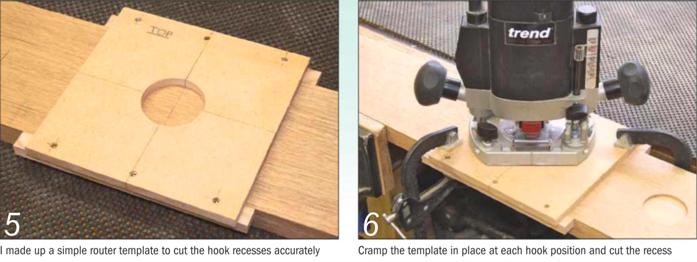
To use the template, align it to the hook position marks made earlier, cramp it to the back board and cut each socket in turn, photo 6. Make sure that you get clean cuts by using a sharp router bit; the flutes on the bit are easily sharpened using a diamond stone and some lapping fluid. The router plunge stop gives a precise depth of cut, ensuring that the hooks are a consistent flush fit with the back board.
Fitting the hooks
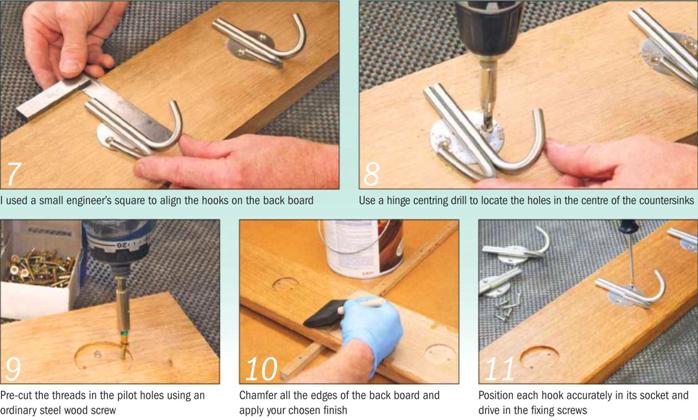
It’s now time to attach the hooks. The human eye is surprisingly sensitive to items not being perfectly vertical, so it’s important to align the hooks carefully, photo 7; I used a small steel square for this. Then you can mark and drill the pilot holes for the stainless steel screws that are supplied with the hooks.
I used a hinge centring drill to locate the holes in the exact centre of the hook countersinks, photo 8, before drilling the holes a little deeper. It’s worth numbering the position of each hook, as quite often the hole positions in hardware vary slightly, especially if they come from different manufacturing batches.
Now screw the hooks in position and check they fit correctly. Oak is a particularly hard wood, so to prevent cam-out that could damage the appearance of the stainless steel screw heads, I first cut the threads in the pilot holes using ordinary steel wood screws, photo 9.
The final stages
Remove the hooks and soften the appearance of the back board by cutting a small chamfer profile along the front edges. I cut these using my router fitted with a bearing-guided 45° chamfer bit, minimising the effects of any break-out by cutting the ends first and taking several passes.
Give the back board a final sanding and apply your finish. I brushed on three coats of hardwax oil, photo 10, rubbing the wet surfaces with wet-and-dry abrasive paper to give a perfectly smooth finish. Then all that remains is to reassemble the coat rack, photo 11, and hang it on the wall.

I used pairs of large stainless steel screws which I lined up with the wall studs, and counter-bored their holes so I could recess the screw heads. Then I fitted oak plugs with pva adhesive, tapping the plugs into place, photo 12, before trimming them flush using a sharp chisel and finishing them with hardwax oil to match.